
Practical guide to reset or change password of VirtualBox VM

Click the link below to see how to reset password.
وڈیو دیکھنے کے لئےکلک کریں!۔
This is a practical navigation and step-by-step exercise of recovering the forgotten password of the Linux Virtual Machine.
لینکس سیسٹم پر وِرچُؤالباکس میں مشین کاپاسورڈ تبدیل کرنے یا پاسورڈ بھول جانےکی صورت میں کیااقدامات کیئے جاسکتےہیں، اس موضوع پر ایک مرحلہ وار عملی مشق تحریر کی صورت میں پیشِ خدمت ہے۔
Warning:
:تنبیہہ
Please keep in mind that you are going to do all this work as a Root-user/Super-user/Administrator.
Be careful whenever you are typing a command.
یہ بات ملحوظِ خاطر رکھیں کہ آپ یہ سارا کام بطورِ
(Root-user/Super-user/Administrator)
کر رہے ہیں۔
کوئی بھی کمانڈدیتے وقت خوب سوچ سمجھ کر ٹائپ کریں!!!۔
~ 1 ~
~ 2 ~
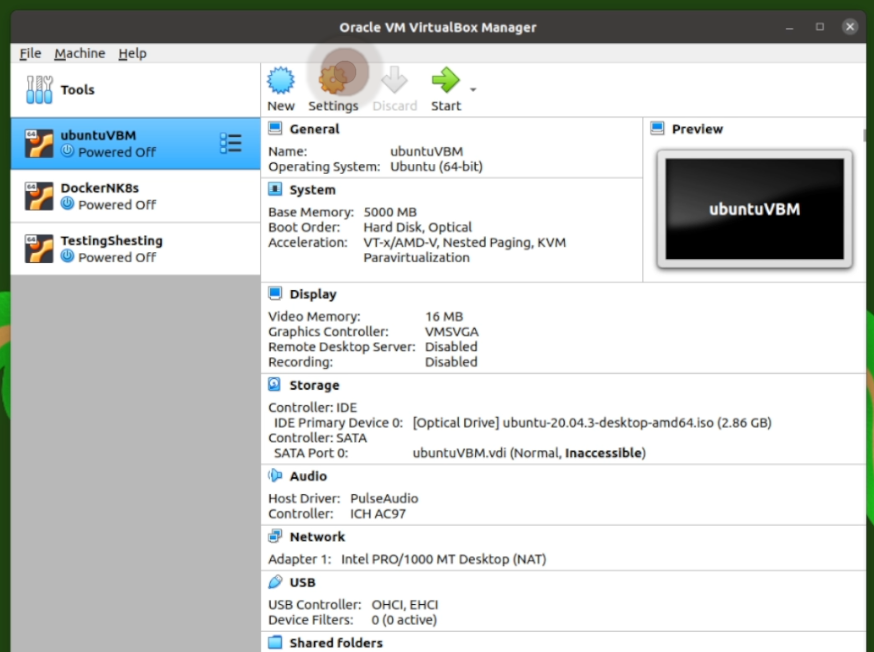
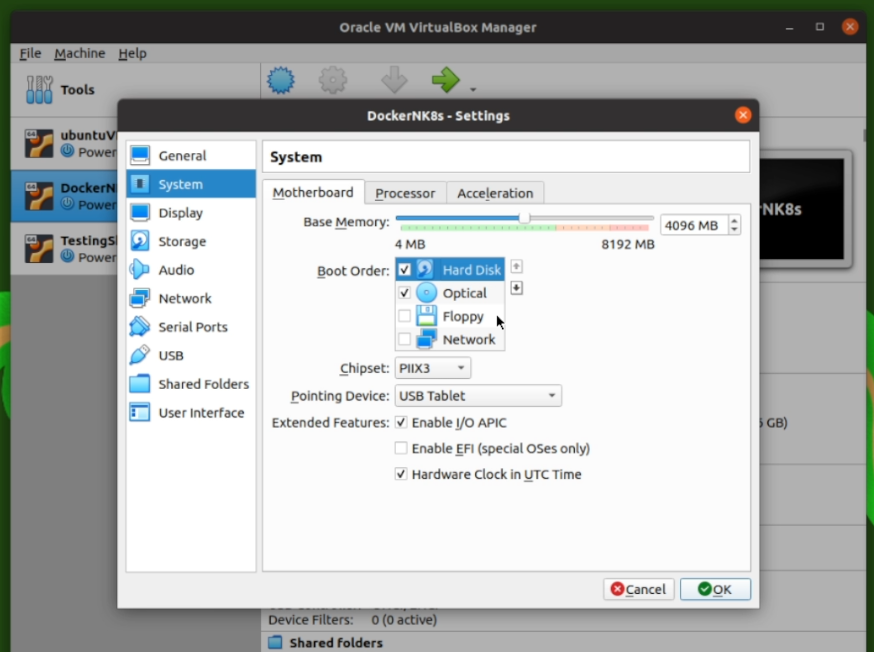
In order to select our First Boot Disk; On this screen, we’ll click on System.
If our System disk is not at top of the Boot Order list, we will move it up and press OK.
اس سکرین پرہم ” سسٹم ” پر کلک کریں گے اوربوُٹ آرڈر میں
بُوٹ ڈسک کا انتخاب کریں گے۔
اپنی بوٹ ڈسک منتخب کرکے اسے بُوٹ آرڈرمیں پہلےنمبر پر لائیں گے۔ تاکہ ہما را سسٹم اسی ھارڈ ڈسک سے بوٹ ہو۔ یہ سب کرنے کے بعد اؤکے کر دیں گے۔
NOTE:
If your boot disk is already in its place, then you can start from step 3.
ضروری نوٹ
اگر آپ کی ڈسک بوٹ آرڈر میں اپنی ٹھیک ترتیب پر ہے، تو آپ نمبر 3 سے ہی شروع کر سکتے ہیں۔
~ 3 ~
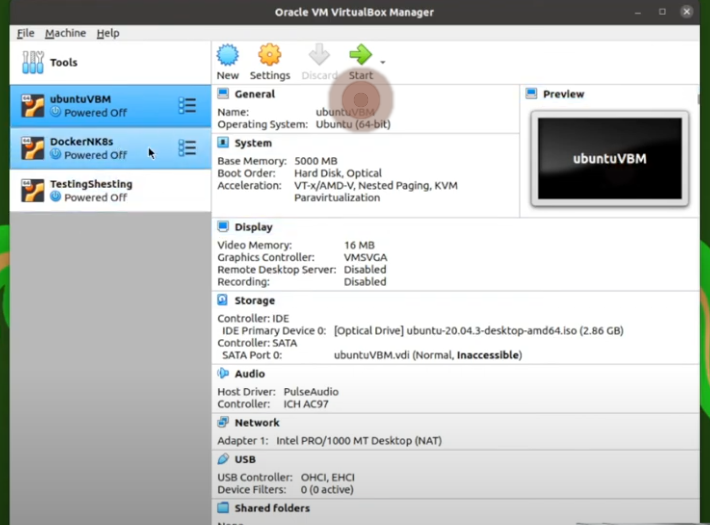
Select your machine and click the Start button. And keep clicking the Shift button, until you get the screen shown below “Picture – 4”.
مطلوبہ مشین کو سلیکٹ کریں اورسٹارٹ پر کلک کریں۔ اور ساتھ ہی شفٹ کے بٹن کو کلِکِلائیں۔ یعنی دباتے رہیں۔ یہاں تک کہ نیچے دی گئی تصویر “Picture – 4” والی سکرین آجائے۔
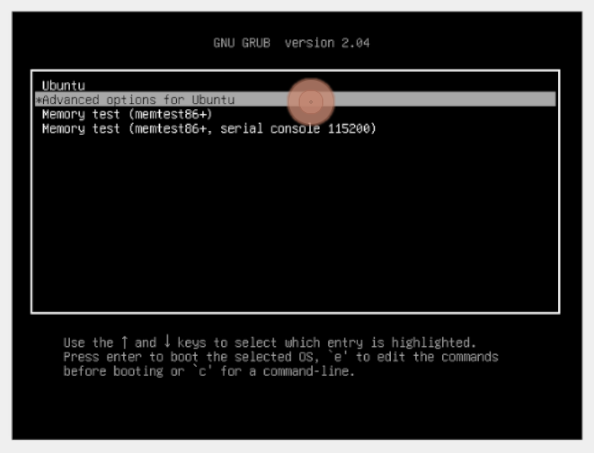
GNU GRUB Screen to select the requisite OS to boot your machine.
Note; here you can only use Arrow keys nd Enter key.
Select “Advanced options for Ubuntu” and press Enter key.
یہاں صرف تیر کےبٹن اور اِنٹر کام کریں گے۔ لہٰذا؛ ان کا استعمال کرتے ہوئے
Advanced options for Ubuntu
سلیکٹ کرکے انٹر کا بٹن دبا دیں۔
~ 4 ~
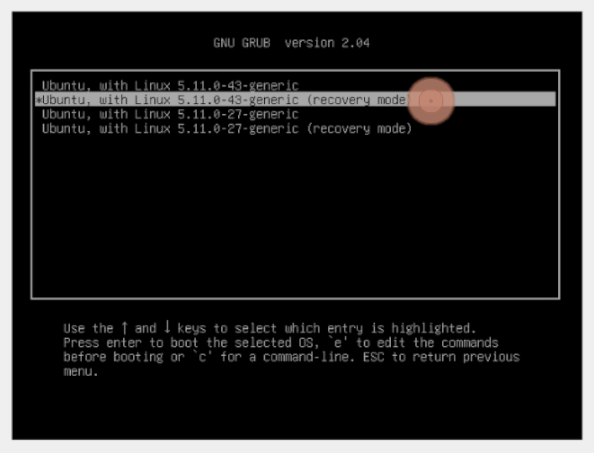
Now in the following screen select
Ubuntu, with Linux … etc …etc – … (recovery mode)
and press Enter key.
اب ذیل میں نظر آنے والی سکرین پر
Ubuntu, with Linux … etc …etc – … (recovery mode)
کو سلیکٹ کرکے انٹر کا بٹن دبادیں۔
~ 5 ~
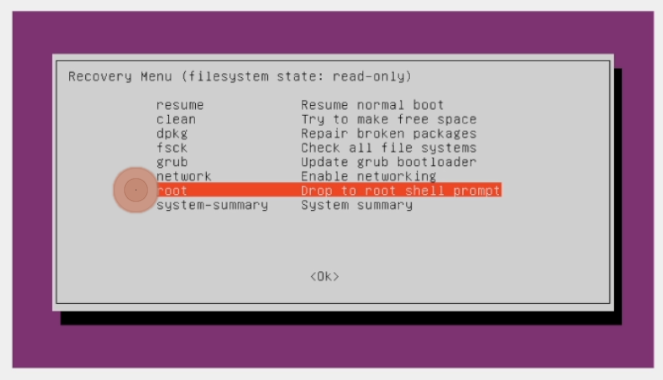
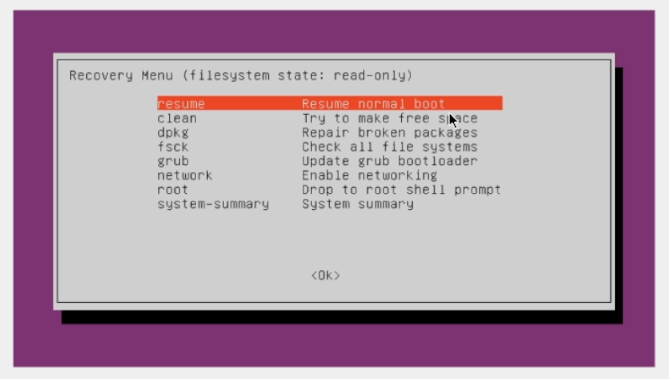
Now a Recovery Menu screen will appear.
Select “Root: Drop to root shell prompt” in the list and press Enter key.
اب آپ کے سامنے ریکَوْری مَینؤ کی سکرین آجائے گی، اس کی لسٹ میں سے ” رُوٹ: ڈراپ ٹو روٹ شیل پرامپٹ ” کو سلیکٹ کر کے انٹرکا بٹن دبادیں۔
~ 6 ~
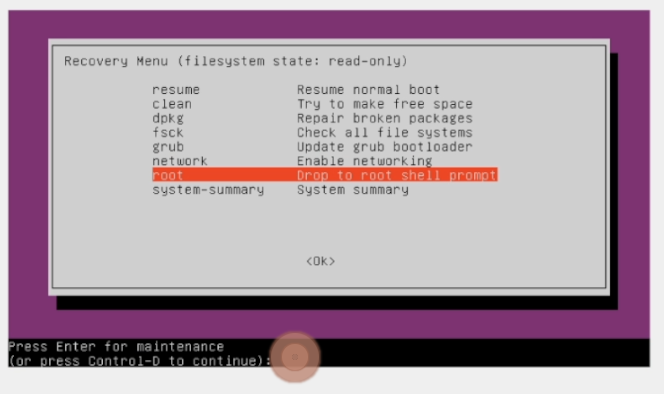
On the following black screen it says:
Press Enter for maintenance
(or press Control-D to continue):
We shall press Enter key. because we are in the maintenance process.
اِس نئی سکرین پریہ کہہ رہا ہے کہ
Press Enter for maintenance
(or press Control-D to continue):
چونکہ ہم مرمتی کام کے مراحل سے گزر رہے ہیں اس لئے ہم ایک بار پھر انٹر کا بٹن دبائیں گے۔
~ 7 ~
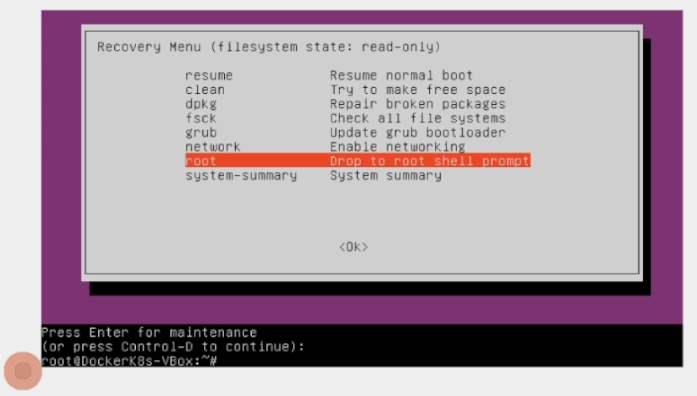
As we press Enter key the root/super-user prompt will appear;
انٹر کرتے ہی سُپر یُوزر\ رُوٹ پرامپٹ آجائے گا۔
root@DockerK8s-VBox:~#
~ 8 ~
As the system is in Read-only mode we will enable Read/Write and Remount the Root.
So, type the following command and Enter:
چونکہ فائل سیسٹم اس وقت رِیڈ اَونلی مَوڈ میں ہے، اس لئے
ہم روٹ کو[ رِیڈ / رائیٹ ]پرمِشن کے ساتھ ری ماؤنٹ کریں گے۔ لہٰذا؛
مندرجہ ذیل کمانڈ ٹائپ کرکے انٹر کردیں:۔
mount rw -o remount / ~ 9 ~
Now just to reconfirm the correct root user name we will type the following command:
اب رُوٹ یوزر کا صحیح نام دیکھنے کے لئے ہم مندرجہ ذیل کمانڈ دیں گے۔
ls /home My user name was as follows
اس مشین پر یُوزر اس نام سے تھا۔
maqbool

~ 10 ~
Now we reached the point to change our password. So, pick your notebook up and write your password in it first!
اب پاسوَرڈ تبدیل کرنے کا وقت آگیا ہے، نوٹ بک بھی کھول لیں; اورجو پاسوَرڈ دینا ہے، پہلے اسے نوٹ کر لیں!۔
اب مندرجہ ذیل کمانڈ سے پاسورڈ بنالیں:۔
Now with the following command create your password:
passwd your-username As the command executes the system will ask you to type new password and the confirm by retyping.
کمانڈ کے چلتے ہی یہ نیا پاسورڈ مانگے گا اور پھر دوبارہ کنفرمیشن کرے گا۔

Here we are, type your new password and
retype it to confirm and Congratulations you’ve just regained control of
your machine by changing the forgotten password through this exercise.
Now type Exit
and in the following screen select:
Resume: Resume normal boot
and we are DONE!
لیں جی ہم نے بھُولا بِسرا پاسورڈ تبدیل کرلیا۔
Exit ٹائپ کریں
اور نیچے آنے والی سکریں پر
Resume: Resume normal boot
کو سلیکٹ کرکے انٹر دبائیں، اور اپنی مشین کا کنٹرول سنبھالیں۔
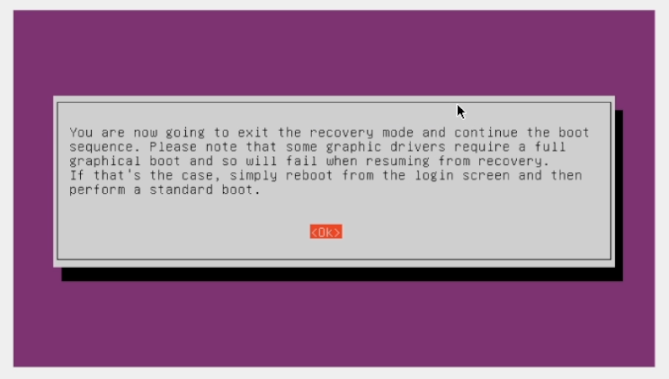
Press Enter for OK in the following screen to continue normal Reboot
نیچے نظرآنے والی سکرین پر اؤکے کے لئے انٹر دبادیں تاکہ نارمل ریبُوٹ شروع ہوجائے۔
Thank you for your interest in reading my post.
براہِ کرم کمنٹ کرکے اپنی قیمتی رائے کا اظہار ضرور کریں، اور مضمون کو آگے شیئر بھی کریں۔ شکریہ